Brief history of screen printing
It is believed that screen-printing was introduced to Western Europe from Asia sometime in the late
1700s, but did not gain large acceptance or use in Europe until silk mesh was
more available for trade from the east and a profitable outlet for the medium
discovered. Screen-printing was first patented in England by Samuel
Simon in 1907. It was originally used as a popular method to print expensive
wall paper, printed on linen, silk, and other fine fabrics. Western screen
printers developed reclusive, defensive and exclusionary business policies
intended to keep secret their workshops' knowledge and techniques.
Early in the 1910s, several printers experimenting with photo-reactive chemicals
used the well-known actinic light activated cross linking or hardening traits of
potassium, sodium or ammonium bichromate chemicals with glues and gelatin
compounds. Roy Beck, Charles Peter and Edward Owens studied and experimented
with chromic acid salt sensitized emulsions for photo-reactive stencils. This
trio of developers would prove to revolutionize the commercial screen printing
industry by introducing photo-imaged stencils to the industry, though the
acceptance of this method would take many years. Commercial screen printing now
uses sensitizers far safer and less toxic than bichromates, currently there are
large selections of pre-sensitized and "user mixed" sensitized emulsion
chemicals for creating photo-reactive stencils.
So did we lose you yet? Just check out the step by step pictorials below for a more condensed explanation of how shirts are printed.
Burning in a screen
The process begins by placing vectorized art on the screens and exposing the screens and art on a specialized light box for several seconds then taking the screens to a wash out bay to rinse off the exposed emulsion thus revealing the stencil.
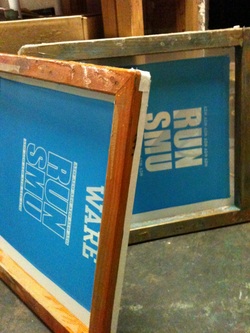
Taping the screen
Once the screens have been rinsed and dried of excess water, they are then checked for any inconsistancies or pin holes that might show up on the garment during the printing process. It should be recommended that one last check should be made for any misspellings or artistic errors at this point. It is also recommended to tape off any other logos or designs that are not being used.
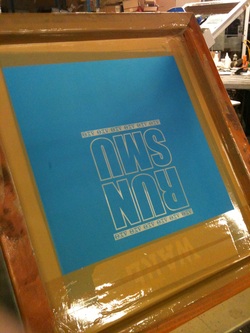
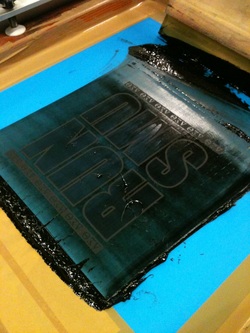
Lining up the colors
When the screens have been prepped and finalized, they are then put on the printing press and lined up to the specific location that will be printed for the particular job run. A system known as "micro-registration" is used to make sure that all artwork and designs are lined up and registered to perfection.
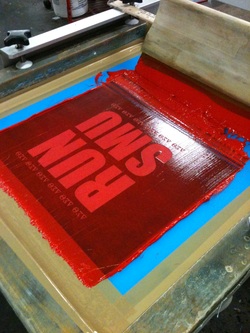
First color
When the 1st color has been printed, the shirt or garment is then placed under a heating element known as a flash dryer for about 5 seconds. This allows the 1st applicaton to be cured or dried to the touch. The 2nd color can then be applied as we can see in the next step below.
Second color and registration
As stated above, the 2nd color is then ready to be registered to the existing 1st color. Usually the process goes from lightest to darkest but there are a few exceptions.
Almost there
When the last screen is all lined up, the correct color ink is then placed in the screen.
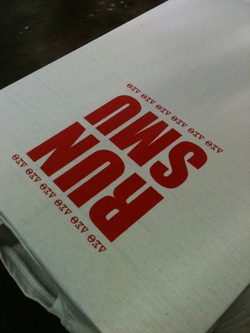
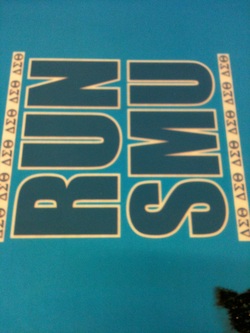
Final product
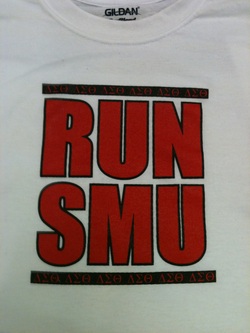
The t-shirt or garment is then ran through an industrial dryer set to 350 degress for about 20 seconds to achieve the correct cure. The end result is a t-shirt or garment ready to wear!
So give us a call when you are ready to print your next order!
So give us a call when you are ready to print your next order!
